Select the Xerox DocuPrint printer driver.
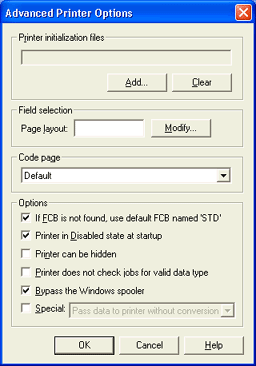
When you add a spool printer, select Special: Pass data to printer without conversion on the Advanced Printer Options dialog box.

These common questions are typically associated with TCP/IP. If you can't find the answer to your question here, click the Index or Search tab of the Help to search for a specific word or phrase.
How is the job name determined for jobs received with a TCP/IP port?
How do I print EBCDIC data received from TCP/IP on a Xerox DocuPrint printer?
How do I setup an LPD queue to receive ASCII files from the VM-VSE host over TCP/IP?
How are TCP/IP control file fields are mapped to header fields?
How do I route LPD jobs to printers based on the LPD queue name?
What is the best way to receive data over TCP/IP from a mainframe?
To configure the host for LPD, you need the IP address of the Barr computer and the receiving LPD queue name that displays on the LPD tab.
To configure the host for TCP/IP socket, you need the IP address of the Barr computer and the receiving port number specified on the Port Properties dialog box.
The job name that displays in the Spool Window is determined by the value in the NJHGJNAM - Job name field. This field can be set by configuring the Document attributes on the Port Properties dialog box or by creating an override table to automatically populate the field.
If the NJHGJNAM field is not configured, the job name will be automatically set to xxxxx.yy. Where, xxxxx is the TCP/IP port number and yy is an incrementing number.
ASCII data is typically received using TCP/IP. Therefore, you must first verify the type of data and carriage control being sent from the mainframe. Once you verify that the data is EBCDIC, create a Windows printer using the following options.
If you will be sending the data to a Xerox DocuPrint EPS Acronym for Enterprise Printing System. and you have purchased the BARR/PRINT to EPS module, see the Getting started with BARR/PRINT to EPS topic.
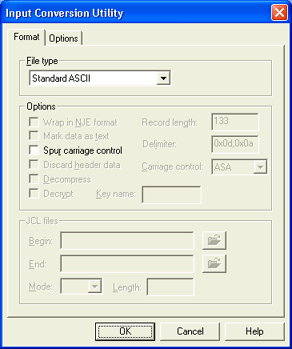
Configure a TCP/IP print queue. On the Format tab, select the Binary (raw) file type.
Use LPR to send the file to Barr Host Communications Suite.
When the file appears in BHCS, use the Viewer Utility to view the document.
On the Viewer Utility menu bar, select View | Binary | EBCDIC. If you can read the data, the data is EBCDIC. If it is not readable, it is ASCII data.
If the file is using EBCDIC data, create a Windows printer using the following options.
Select the Xerox DocuPrint printer driver.
When you add a spool printer, select Special: Pass data to printer without conversion on the Advanced Printer Options dialog box.

Send the file to the newly created printer.
By default, each LPD queue contains a default LPR control file command that is configured to receive standard ASCII files. To set up an LPD queue to receive ASCII files from the VM-VSE host, you need to define the queue and use the default LPR command.
It can be helpful to know how Barr Host Communications Suite maps the TCP/IP control file fields (as defined by RFC 1179) to header fields. The header fields that begin with NJHG are located in the Job header general section. The fields that begin with NDHD are in the Data set header LPD/user custom section. The following table shows the relationship between the control file commands and the header fields.
The control file can be used as routing criteria by adding control file attributes to columns in the Spool Window. However, if the control file follows the data, the jobs cannot begin printing until the entire file is received because the routing information is contained within the control file.
The NJHGJCPY and NJHGJID fields are also set, but not directly from a value in the control file.
|
Control File Field (Code letter) |
Header fields |
|
Class for Banner Page (C) |
|
|
Host Name (H) |
|
|
Indent printing (I) |
|
|
Job Name for Banner Page (J)* |
|
|
Print Banner Page (L) |
|
|
Mail When Printed (M) |
|
|
Name of Source File (N)* |
|
|
User Identification (P) |
|
|
Symbolic Link Data (S) |
Not preserved |
|
Title for pr (T) |
|
|
Unlink Data File (U) |
NDHDUNLK |
|
Width of Output (W) |
|
|
troff R font (1) |
|
|
troff I font (2) |
|
|
troff B font (3) |
|
|
troff S font (4) |
|
|
Extended print option (X) |
|
|
LPD Data File Name* |
* |
|
Print Type |
|
|
Queue Name |
* The following fields, in order, are used to populate NJHGJNAM and NDHGNAME: source file name, job name for banner, and LPD data file name.
The Barr Host Communications Suite, unlike the Barr DOS product, allows you to apply banner pages to jobs from any source, not just from LPD Acronym for Line Printer Daemon. The remote printer server that allows other hosts to print on a printer local to your host.. If you want to print banner pages, you need to configure banners on the output side for each printer. The banners will take effect regardless of the data source. Barr Host Communications Suite also provides the Make Banner utility to design custom banners. For example, you can easily design a banner that looks exactly like the Barr DOS LPD banner.
To customize a banner, complete the following steps.
Create a banner using the Make Banner utility.
Open the Configuration Utility.
Select your banner and trailer pages for each printer.
If you only want some jobs to print with banners, you can define two logical printers that point to the same physical printer. You can then enable banners on one of the logical printers to use for jobs with banners. To do this, complete the following steps.
To set up routing criteria based on the LPD banner flag, add the NDHDPBAN column to the Spool Window.
The <Default> LPD queue allows Barr Host Communications Suite to receive data on LPD queues that are not specified on the LPD tab. If you delete the <Default> queue, LPD will reject all requests to queues that are not listed. A message will appear in the Operator Console stating the name of the requested queue and that the connection was refused. You can create a new default queue by adding a new queue named <Default> and assigning the following properties.
|
Command |
Format |
|
<Default> |
Standard ASCII |
|
f--Formatted text |
Standard ASCII |
|
p--pr format |
Standard ASCII |
|
r--FORTRAN carriage control |
ASCII with ASA carriage control |
|
v--Verbatim |
Binary |
|
x--Extended |
Type: barr, Format: Barr archive |
Complete the following steps to customize the Spool Window to view incoming document fields specific to LPD.
Open the Spool Window.
On the menu bar, select View | Format Columns to change which columns to display. The Format Columns dialog box displays.
In the Available sections drop-down list, select Data Set Header User Custom Section/LPD.
In the Available columns list, select the header fields you want to view for incoming LPD documents and click the arrow (>). The header field now displays in the Visible columns list.
Click Move Up and Move Down to position the fields on the Spool Window. You can also rename the column heading by clicking Rename.
When you finish arranging fields, click OK. Notice the column headings and positions across the Spool Window.
Host name values are cached so that LPD performance improves after first access by a particular remote machine. The cache time length is controlled by the registry. Use the following procedure to configure the registry.
These steps require you to use the Windows Registry Editor. The system registry contains information about how your computer runs, and your computer might not work if there is an error in your registry. If you are unfamiliar with the Registry Editor, we do not recommend that you perform this procedure. Please contact Barr Systems Technical Support and reference this topic to be walked through this procedure.
On the taskbar, click Start | Run.
Type REGEDT32, and then click OK. The Registry Editor displays.
Select HKEY_LOCAL_MACHINE | SOFTWARE | Barr Systems | SpoolNT | LPD. If the key does not exist, it will be created by LPD when data is received with a default cache time of 60 minutes.
The HostLookupCacheInterval value is the number of minutes a host name will be cached. Each time the BARR LPD service is restarted, the host name values will be verified.
|
Value |
Description |
|
0 |
Don't use caching, look up the host name every time. |
|
values between 0 and 0xffffffff, not including the end values |
Use caching, the host name is valid for the number of minutes specified. |
|
0xffffffff |
Use caching, cached values exist until the BARR LPD service is restarted. |
Exit Regedt32 and restart the BARR LPD service.
TCP/IP allows you to receive data from any TCP/IP-based host, including mainframes equipped with packages such as IBM's IP Printway and LRS VPS/LCDS. With TCP/IP, you have the additional advantage of receiving header information, such as Form Name, Class and Destination when used in conjunction with IP Printway.
We recommend using one of the following methods if you are receiving data on an LPR or IP socket connection from IBM's IP Printway or Levi Ray and Shoup's VPS/LCDS. These methods are recommended over ASCII because they preserve the mainframe carriage control and avoid data translation.

Receive the data using LPD.
IP Printway files populate additional header fields based on the -o control file flag. See the LPD header fields topic for specific information.
Complete the following steps to configure the host.
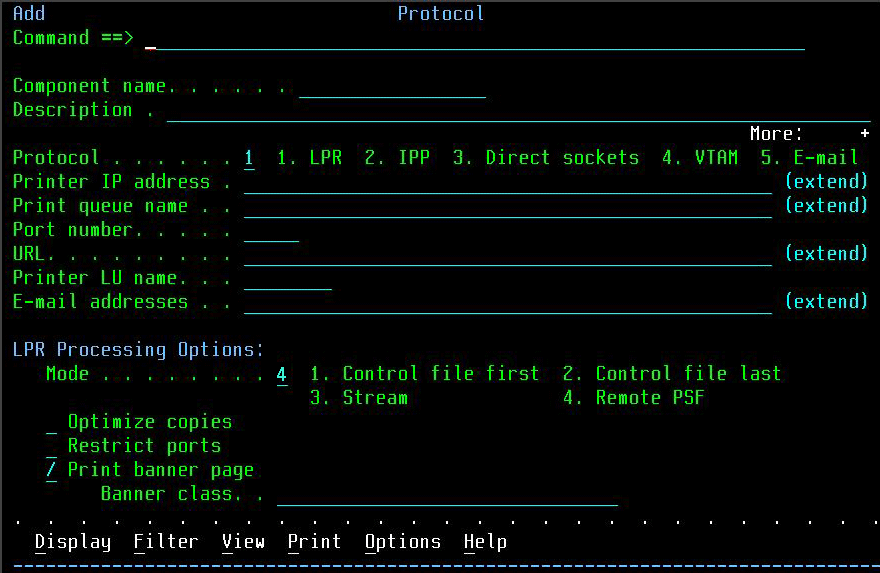
Set the Print queue name option on the mainframe equal to the LPD queue name where you will be receiving data. This displays on the LPD tab.
Specify Mode=Remote PSF on the mainframe.

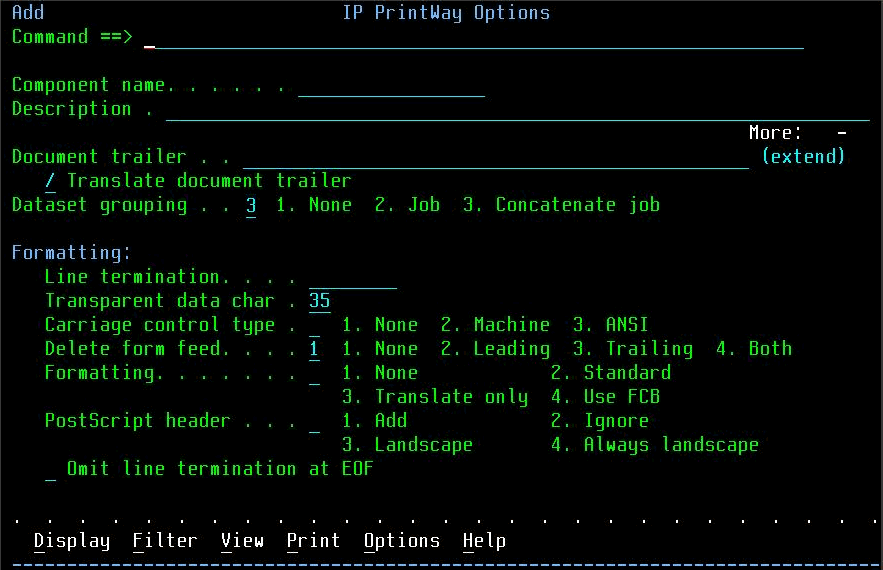
We also recommend selecting Dataset grouping=Concatenate job on the mainframe. Selecting this option will cause multiple data set jobs to be received as single jobs.

Complete the following steps to configure the LPD. See the Getting started topic for more information.
Verify that the queue name displayed on the LPD tab matches the Print queue name option on the mainframe.
Select to receive the data in the Mainframe IP record format on the Format tab.

Receive the data using the TCP/IP Socket.
Complete the following steps to configure the host. In the following example definition, the parameters that must be configured are shown highlighted in yellow.
|
*=====================================================================* |
Set TCPHOST to the IP address of the computer running Barr Host Communications Suite.
Set TCPRPORT to the Port number that will be used by the Barr Host Communications Suite. The port number will be specified in the TCP/IP Configuration utility, on the Port Properties dialog box.
Configure VPS to use the TCP/IP direct socket connection and to use the LCDS format for transmitting the data by setting COMMTYPE=(TCPIP,SOK,LCDS). You will match this in the TCP/IP configuration by selecting the Mainframe IP record format on the Format tab.
Configure VPS to add a banner page to the data for each output group by setting SEPAR=(B,VPSSSEPR,OUTGRP). The OUTGRP parameter is important because it groups the appropriate data sets together within a job.
Complete the following steps to configure the TCP/IP Socket settings. See the Getting started topic for more information.
Verify that the Port number specified on the Port Properties dialog box matches the TCPRPORT option on the mainframe.
Select to receive the data in the Mainframe IP record format on the Format tab.